Repair Of Disaster
 The repair of disaster at #6 Rogue Lane could turn out to be one of our largest projects of the year. See an article on this disaster in the January Sunriver Scene.
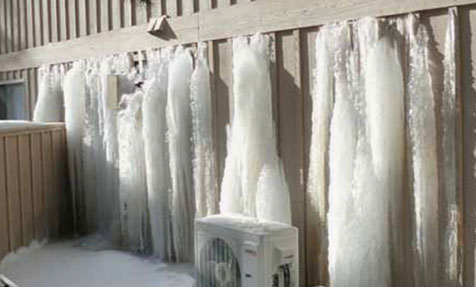
As you can see from the video and stills in the galleries below the entire home is almost starting from scratch. This home was 75% flooded during the coldest time of the year! The water pipe broke in the kitchen upstairs which of course started flooding all of the upstairs. The water then ran downstairs and also through the sill plate separating the two floors. When it ran out the sill plate it flowed into the unit which runs the heat pump and shorted it out, and then the entire home froze with humidity at close to 100%. What a mess!
The disaster restoration company came in and did the clean up if you want to call it that. They pretty much dried out the floors and removed most of the sheetrock and insulation.
We still have to remove the sheetrock in the vaulted ceiling as we think there is alot of moisture up there. Once we have finished the “demo” (demolition) we’ll have another mold test to determine if it’s safe to rebuild. Once we get the go ahead there, then we’ll start running on all cylinders to “Get ‘Er Done!”
Stay tuned!
May 30th Update – We have come back from disaster!
 6 Rogue Lane was a complete interior remodel back from the icy disaster we found it in when we started the job in February. A pre-holiday storm and COLD spell (the Polar Vortex) caused a leak in a water line upstairs. The water ran and ran and ran…..then it froze! It froze outside to the tune of -28 degrees. It froze so cold the heat pump shorted out and then it froze more in the house. So when water freezes in the house it eventually thaws. When it thaws, it forms mold. (Now is the time to read parts 1 & 2)
We took the job on in Mid February and by the end of May, we are completed and the home will be buzzing with family for the summer!
April 29, 2014 Update
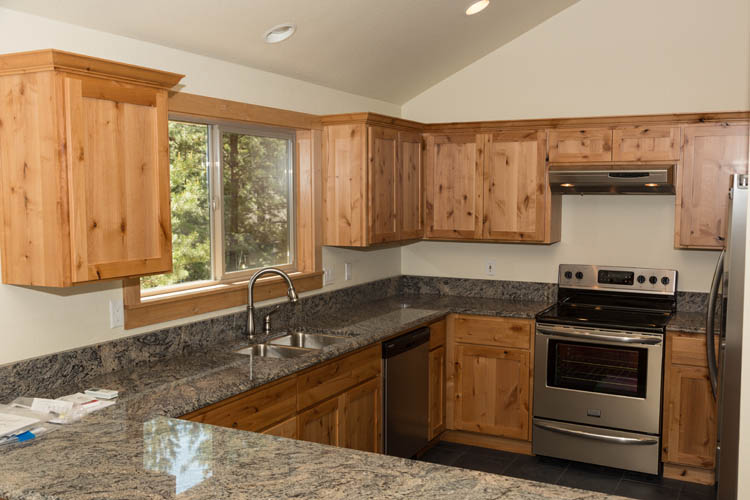
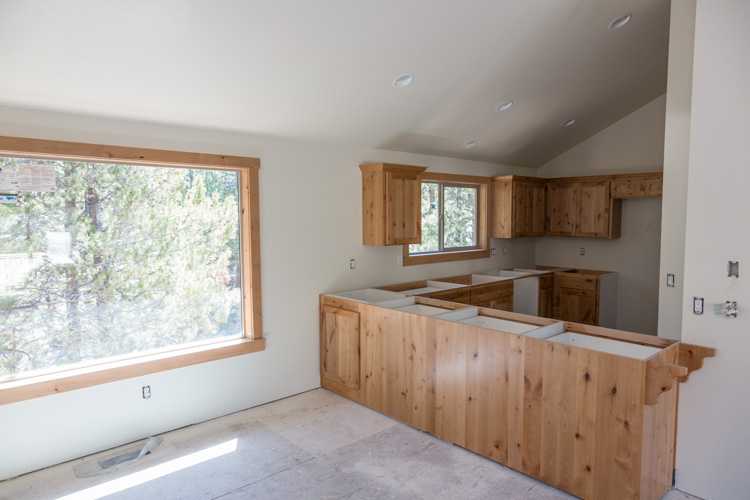 After almost 6 weeks of hard work we are now ready to start trimming out #6 Rogue. What’s that you say! In only 6 weeks! Well we have worked almost non-stop along with our sub-contractors to get this home ready for Summer for the owners. As you can see from the pictures we have replaced all the damaged drywall, re-insulated, re-roofed the house, installed the new cabinets, laid new tile on much of the floor and installed the new doors!
Trim-out time for electrical, heating and plumbing systems is when the house begins to look and act more finished.
Baths get sinks, faucets and toilets. Kitchens get sinks and faucets and range hoods. Heating ducts disappear with tidy grills, and everywhere extension cords recede as electrical outlets multiply. Homeowners start picking out (or at least arguing over) paint colors and collecting wallpaper books.
While trim-out is the last stage before decorating, there are some elements of a design scheme that need to be in place first: ceramic or vinyl bathroom floors, for instance.
The plumber usually wants to install toilets and vanities on top of a finished floor. That not only makes it easier to install the floor (especially if you are using some form of vinyl one-piece flooring), it also means the plumber can be sure you’re not going to remove his fixtures and reinstall them incorrectly. (If you’re using tile that doesn’t provide a smooth surface, install the vanity first. Otherwise it could be wobbly.)
Most people install kitchen cabinets before flooring (to save material costs and ensure that the cabinets rest on a perfectly flat surface), though sinks and faucets may not be put in until the plumbing trim-out.
Some electrical trim-out work can be done even before drywall is installed, especially if you need some receptacles to plug in tools. Drywall is easier to install and finish if the wires can be pushed back into the box out of the way of finishing trowels, so only do a few this way. We usually ask the electrician to install one receptacle per floor at the rough-in stage. And definitely do not install fancy ceiling fixtures until the painting is complete and you are through generating dust.
Generally, once all the walls are smooth, all the floors are installed and all surfaces are basically ready for paint.
We anticipate being complete by Memorial Day! Yippee!
March 14, 2014 Update
After a month’s worth of tearing out more sheetrock, insulation then repairing the moisture damage, we are now ready to begin the real job of remodeling this home. Please watch the “Demo Complete” video. Before we could do any REAL remodeling work, we needed to make sure the home would be safe to occupy after complete.
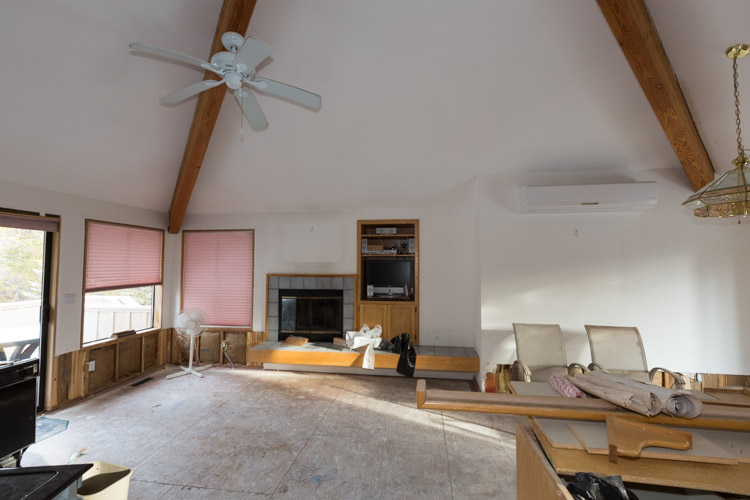 The first order of business was removing any potential for mold. We did this by removing all the sheetrock in the vaulted ceilings. This was left by the disaster recovery “experts”. Here’s the deal. When a room fills with as much moisture as this house did, the moisture looks for a place to go, and we all know warm air rises. Because this home was built before venting the roofs was the standard, the moisture settled in the insulation in the roof. It had no-where to go as there was no ridge vent and no soffit vents to help the air flow. So, it took up home in the insulation. Once we got all that removed, we heated up the house and dried it out some more, then we tested for moisture. Moisture test was GOOD! The final insurance was to coat the entire interior “envelope” of the home with Kilz. Kilz is a great primer and sealer, and a perfect product for this job!
 The second order of business was to replace all the windows in the home with new energy efficient u3 windows. U-Factor (or U-value) is the measure of the window’s ability to conduct heat—in other words, the amount of heat transmitted through the window. The lower a window’s U-Factor, the better the window is at insulating your home. These windows are so efficient that Midstate Electric gave the homeowners a rebate for buying them. The home is all electric heat so this arrangement just made sense!
Next up, the sheetrocking subs will be working inside while we start replacing the roof!